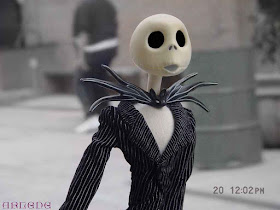
For months I've been on the fence about throwing away a dingy bag of old, half used make-up containers. What if some day there is a tragic accident involving all the make up I use currently? And what if, right after the accident, I have to immediately go out & see a bunch of people? I would need the the old, unwanted make up, right? Its better than walking around bare faced and being mistaken for Jack Skellington. Seriously, I am that pale. When I went to the mall to buy myself some Bare Minerals make-up, I was a 1 on the color scale - a 1! As in 'so white my skin is practically see-through!' The associate could have easily dumped Baby Powder in the make up pot and sent me on my way.
But then I thought, "What if I need that discarded make-up for a craft?" What happens if I'm happily gluing together a macaroni Christmas wreath and suddenly realize I could have sprinkled 'Palm Beach Sunset' bronzer powder over it for extra shimmer, but now its gone? In an effort to be practical (and to avoid going down the slippery slope that leads to hoarding) I gave myself an ultimatum: come up with a use for the make-up in one week or throw it away.
Success! I took apart the eye shadow compacts and used the tiny metal trays to create a couple of magnets. Because they are three dimensional, and because they once held eye shadow, I decided to call them Shadow Box Magnets! Would you like to make a set of your own? Of course you would! Mine happen to be Hunger Games themed, but your little up-cycled masterpieces can feature anything that fits in the trays.
You will need:
*Unwanted pressed powder make-up (make sure it is in metal trays)
*3D Crystal Laquer or some type of resin
*magnets
*Super Glue
*E-6000 glue
*toothpicks
*a variety of tiny things to put inside: glitter, paper, beads, charms, shells, rocks, buttons, stickers, scrapbooking paper, etc.
First, remove the little trays from the compact. I used wire clippers to cut away the plastic, then pulled the trays out with pliers. After removing them, use a toothpick to scrape out make-up into the trash and wash in warm soapy water, then dry thoroughly.
When designing the magnets, I like to think of them in two sections: the background and the main items. If you chose to use paper for the background, cover both sides with clear tape. Without the tape, paper will absorb the glue and become transparent (like my pale skin). You don't want this.
Cut the paper to fit inside your tray.
Use a few dots of super glue to hold the paper in place. If it doesn't want to lie flat, you might have to press the paper down with your fingers or find something heavy to hold it flat until the glue dries. Gluing will prevent the edges from curling up and keep glitter and other sneaky things from slipping behind it before you add the Crystal Lacquer.
If you are using glitter as a background, I recommend adding paper behind it to prevent the metal from showing through in spots. Add it now and use a tooth pick to spread it around evenly.
When you are happy with the composition, its time for the Crystal Lacquer. Slowly fill the tray. Start in the middle; the glaze will flow to the edges. Use the toothpick to remove any bubbles and to push glaze into small open areas. If you are using resin or another 3D glaze, follow the directions on the container. I've never used anything besides the 3D Crystal Lacquer, so I don't know how well the other things work. If you want a bottle of the Crystal Lacquer for yourself, look for it on Etsy.com.
Allow the magnets to dry overnight. If the glaze sunk during the drying process, add another layer and leave for another night or two. This set of magnets took three days to dry completely.
Once they are dry, the glaze with be clear and your magnets should look something like this:
To attach magnets to the back, use a dab of E-6000 glue. The magnets I used already have a thin layer of adhesive, but that adhesive might not be strong enough to stay attached to the heavy tray.
Your wonderful recycled shadow box magnets are now ready to adorn lockers, refrigerators, or anything metal!
***How would you like a pre-made set of these little guys? Emlyn Chand, author of the young adult novels Farsighted and Open Heart is featuring my Hunger Games craft tutorials on her blog with a Hunger Games magnet giveaway. To enter, and learn about her novels and other contests, click here.
The contest is over! Thank you to all that entered!


No comments:
Post a Comment